
It’s hummingbird season again! Last year, my hummingbird shots had a bit of a studio look to them because of the different colored plain backdrops. This year, I was trying for a more natural look.
I selected my spring and summer flowers for their reputation of being hummingbird-friendly, such as red salvias, verbena, petunias, and a gorgeous red mandevilla. However, my hummingbird patrons are apparently fast food junkies and turn up their little beaks at my natural food selection. They might take an occasional stab at the salvia or verbena, but otherwise, they are all about the sugar solution in the feeder. So now the beautiful mandevilla is relegated to serving as background, placed at the far edge of the deck, about ten feet behind the feeder and lit with a flash on a stand.
I put my feeder in the middle of the petunias and verbenas to disguise the feeder from the camera point of view, but by this time in late summer, after two vacations of spotty watering, they’ve gotten a bit too straggly to serve as effective floral camouflage. So I cut extra flowers from our butterfly bushes or the spurned mandevilla to add to the foreground, You can still see the feeder if you look closely, but I can fix that later in editing if I want to take the time.
The added flowers present several challenges, however. They tend to block the flash from reaching the birds, casting unnatural shadows, or forcing my to place my flash higher than I want for optimum lighting. Because they are closer to the flash than the bird, they tend to make the flowers look unnaturally bright. Flowers look more natural lit with a large, soft light source, but hard flash tends to bring out details in the feathers better. So there were compromises to be made. I put a five inch circle of tracing paper in front of my main flash on the right to soften it a little. I also moved my accent flash from its usual position on the extreme left to a new position at frontal left to help bring out detail I was losing with the softer light.
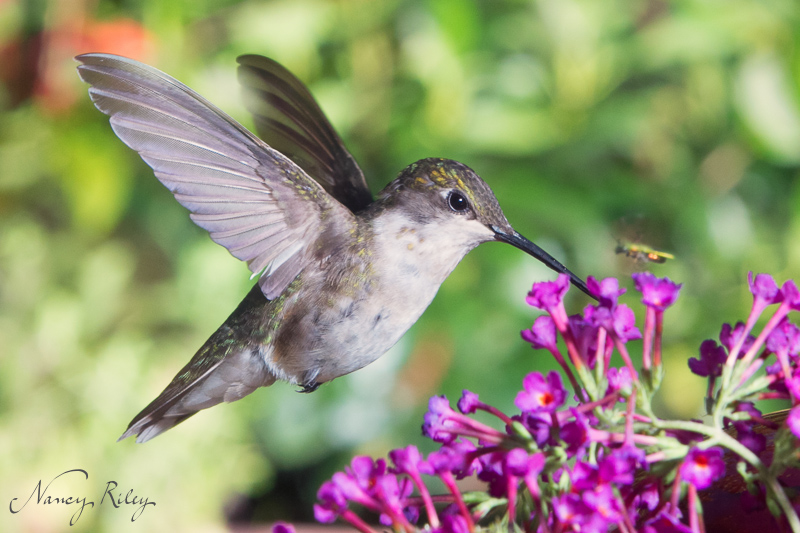
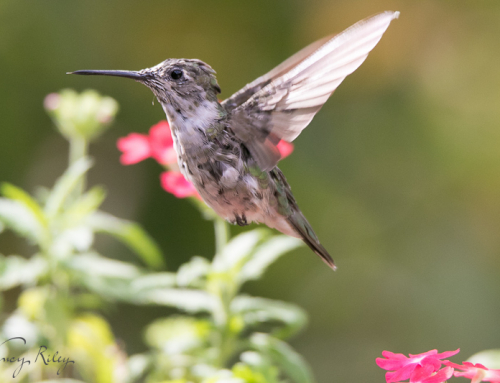
I do wish I could have gotten the little green insect in focus, but even at f/16, depth of focus was pretty thin with focal length 125mm and distance about two feet from the camera. I have cropped this and the following photos slightly, as I have found it much easier to frame the hummingbirds loosely to avoid cutting off bits of tail or wing.
I really wanted a smoother background–not a flat studio background, but something that blended better. I couldn’t move the background any farther away, and the focusing target was already about as close to the window as I could focus, so I chose to experiment with the aperture.
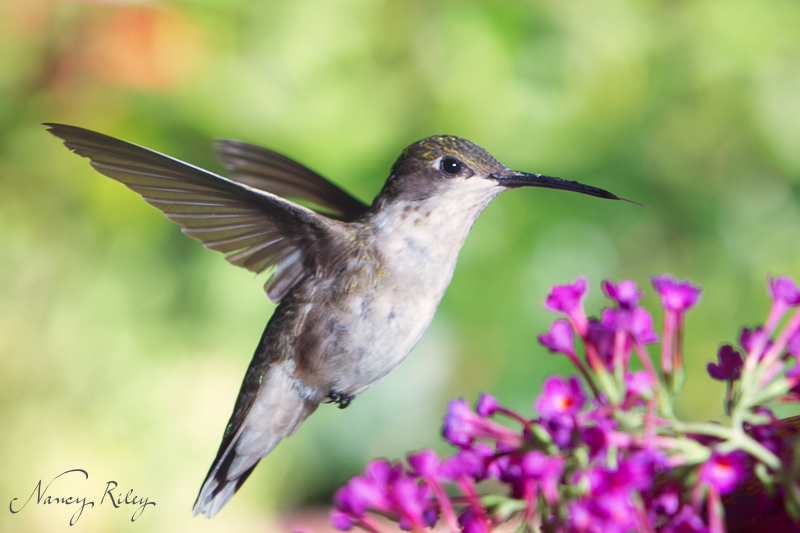
This is f/8. Notice the background is beautifully blended now, which I love. I don’t really mind losing the focus in the foreground flowers, since they weren’t well-focused at f/16 either. However, the details in the bird’s feathers aren’t quite as crisply defined as they were at f/16. Also, my keeper rate based on focus dropped considerably. In fact, this was the only shot that passed muster.
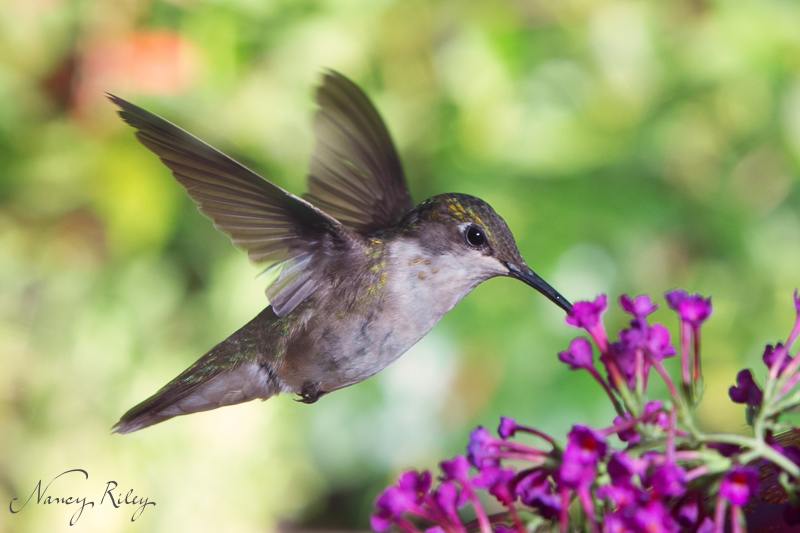
Again, a compromise was made. This is f/11. The background isn’t as creamy as with f/8, but still not as harsh as f/16, and some of the feather detail is coming back. The keeper rate was a little higher, too, although still lower than at f/16.
So to get my ideal hummingbird image, it seems that I must either compromise, or resort to combining multiple images in Photoshop, which I am certainly not above.
What I find ironic is that creating “natural” appearing hummingbird images takes even more planning and adjustment with lighting, foreground and background arranging, and likely in the future, digital editing, than last year’s studio-type shots. However, it is a good exercise in technical problem-solving, and hopefully, next year, when some of these juveniles return with ruby throat feathers, I’ll be ready for them.
Beautiful photos, Nancy. Once again your explanations of camera settings etc are wonderful.
Spectacular bird photos! Love your setting info as well.
You are so patient! Or maybe I’m just so impatient. Beautiful photos again and thanks for the info.