
Last year, my son wanted a Star Wars party for his birthday, but after finding no pool noodles available for lightsaber crafting in January, I negotiated to postpone the Star Wars theme for a year. This gave me a year to dwell on the theme, and naturally, things got out of hand. I looked at many amazing Star Wars cakes on the internet, but finally settled on a Death Star design, because I had a soccer ball cake pan and had successfully pulled off planet and moon cakes based on it in the past. How hard could it be?
Famous last words. The early results looked promising, and I was envisioning Pinterest fame for my marshmallow fondant-plated design imprinted with the riveted texture from a water bottle cap, but then the first Death Star imploded when I was out picking up my son from preschool. It was a fatal overestimation of the load that yellow cake and frosting could support. As I recall, the explosion of the Death Star in the movie was fairly spectacular, but my version just yielded a mess of cake crumbs and buttercream.
I calculated the time I had remaining until the party, and decided that a trip to the grocery and a reboot was not feasible, so the intact parts of the cake were hastily reassembled into the Death Star II. I could only manage a top half, but my son pointed out that in the Return of the Jedi, the Death Star spent most of the movie under construction anyway.
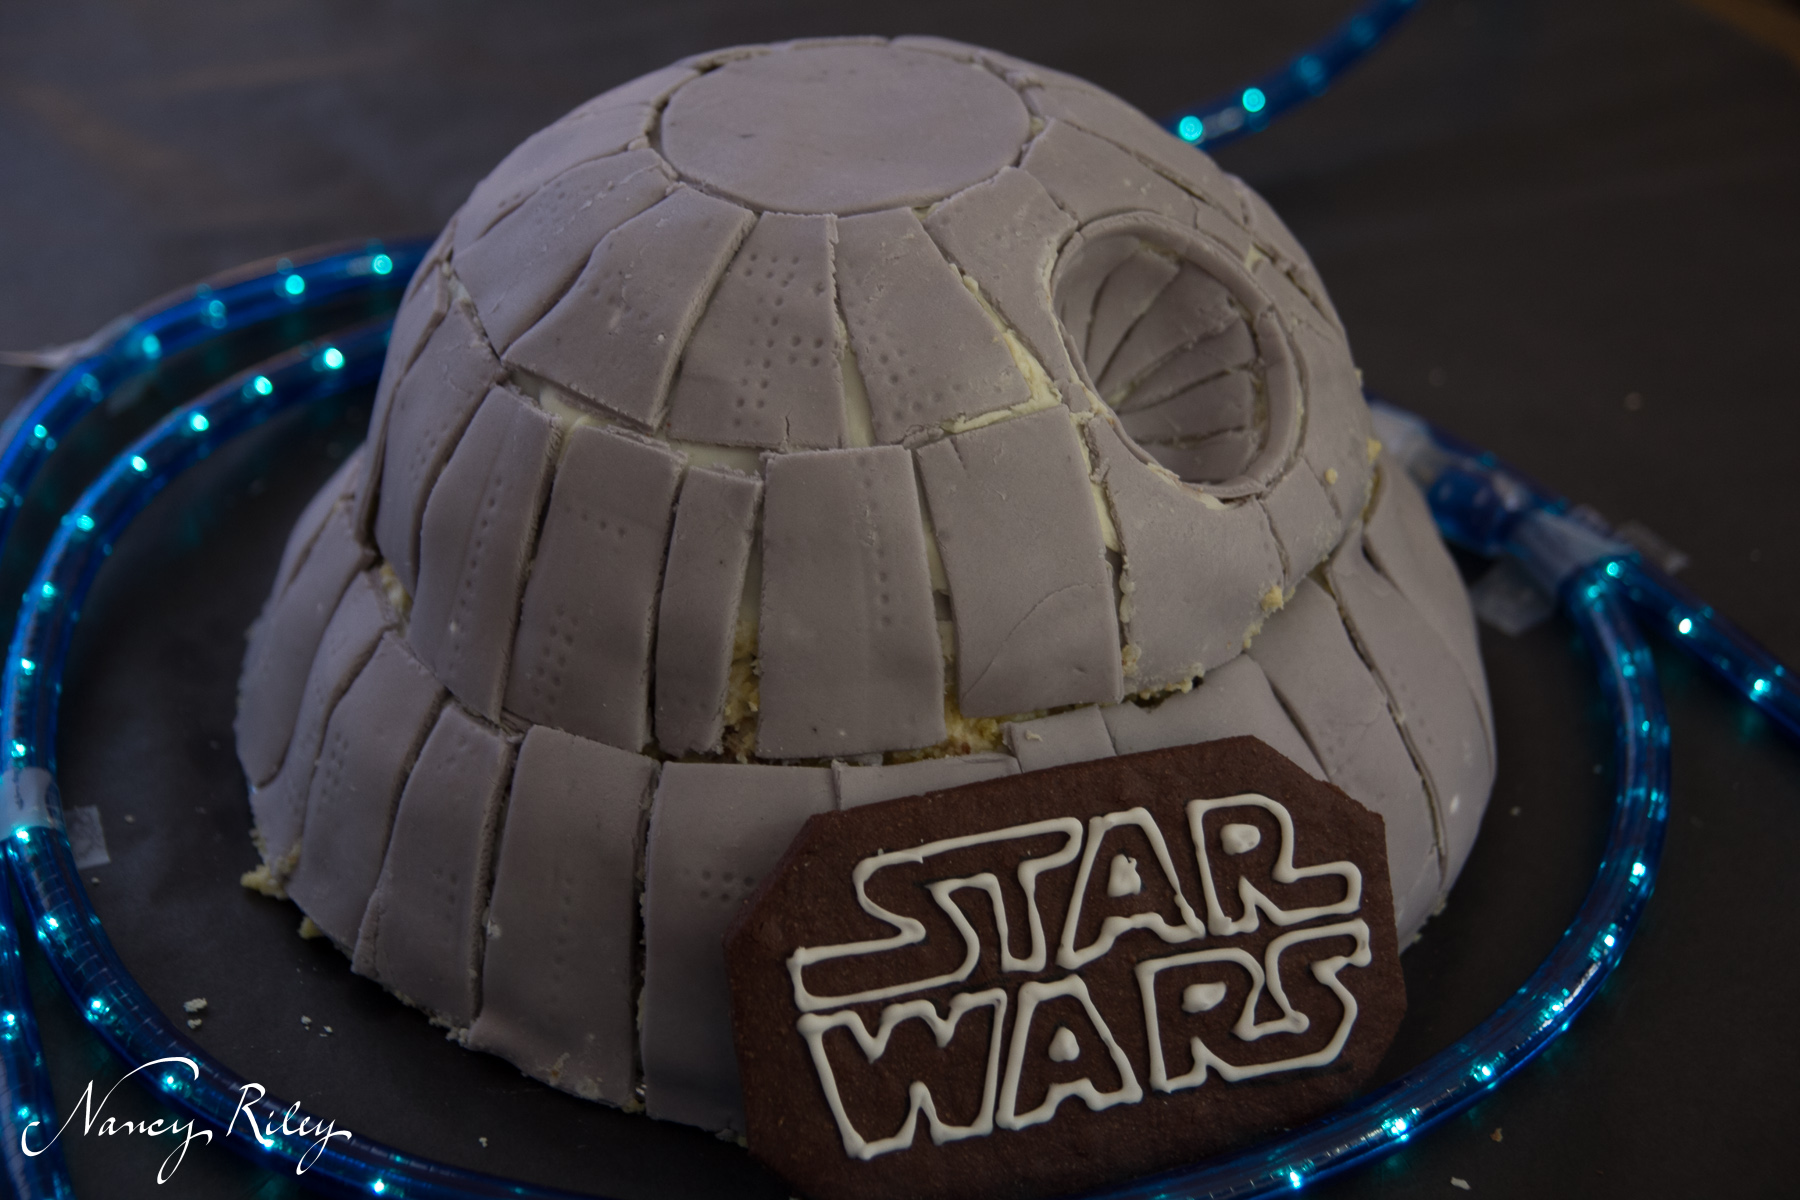
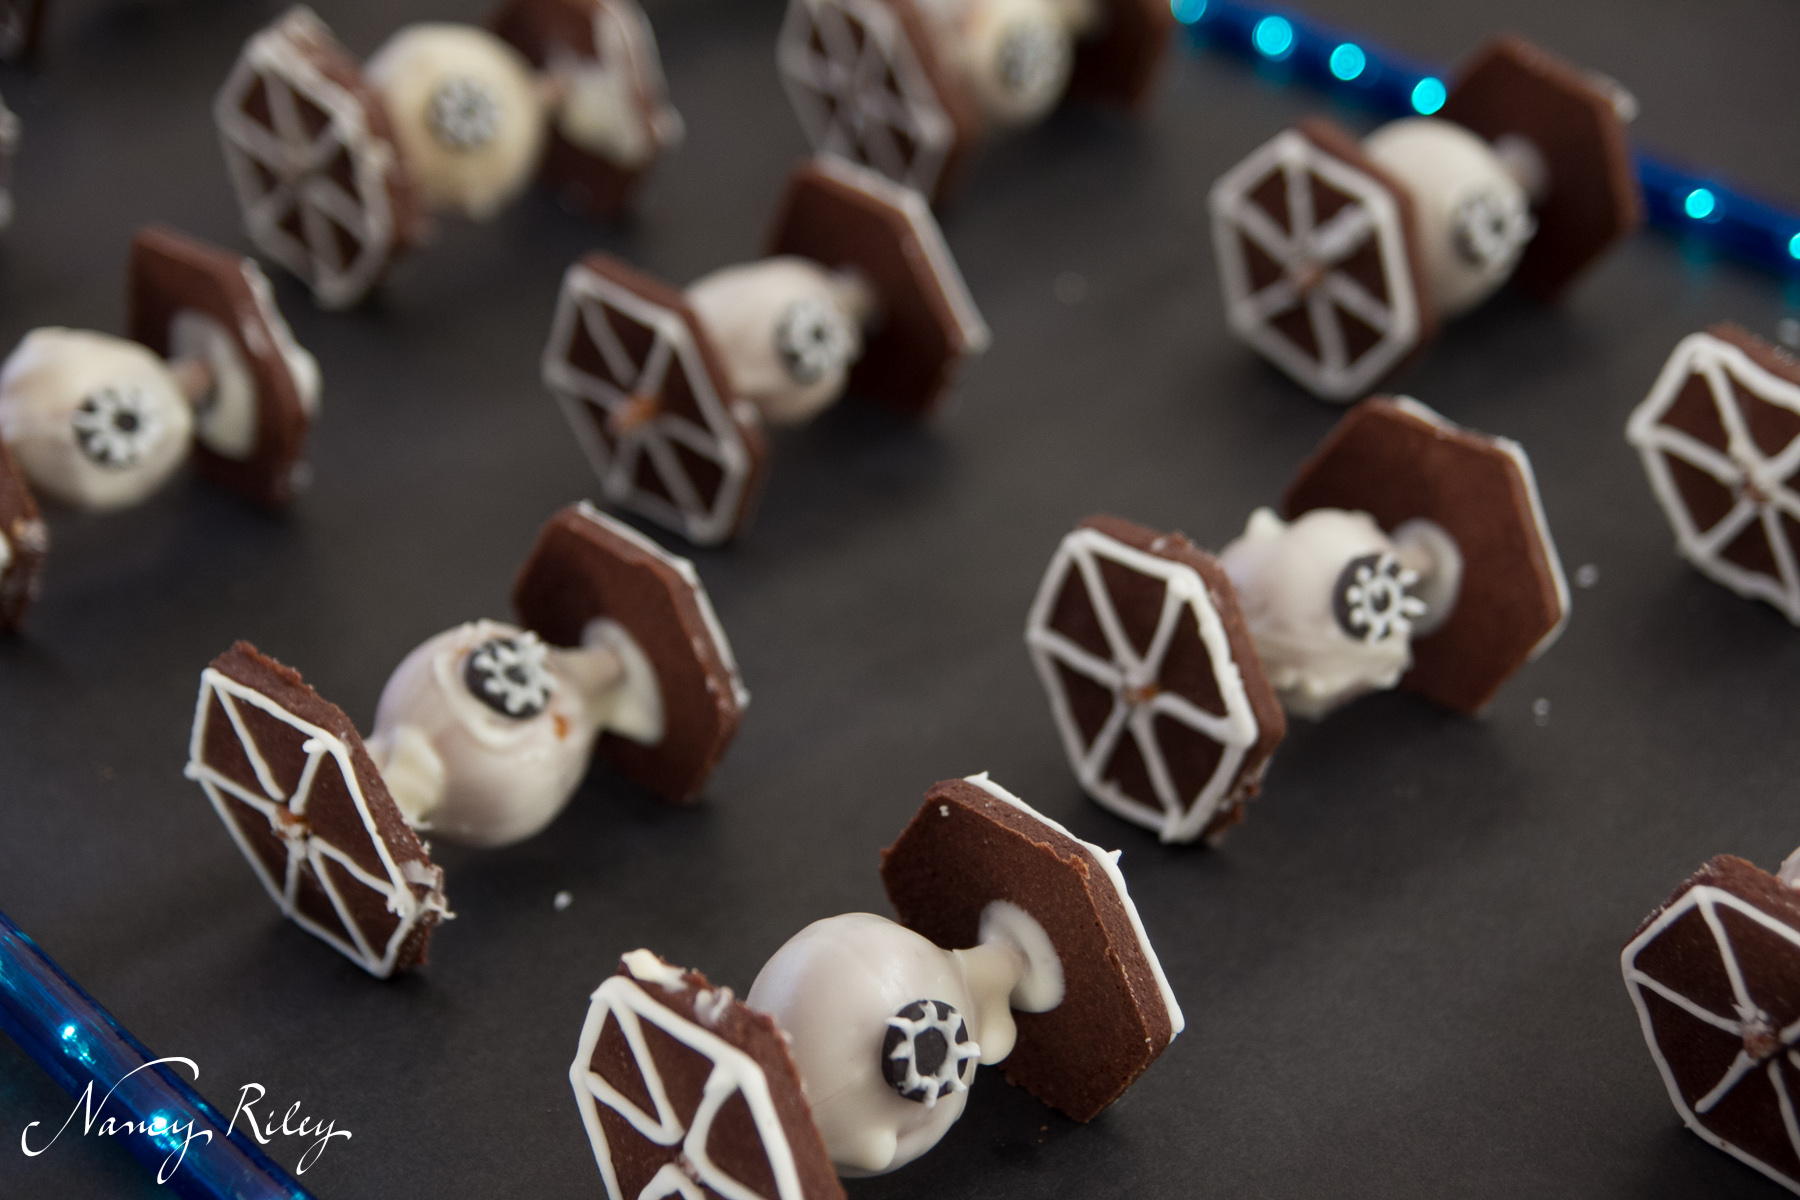
The TIE fighters were more successful, with cake balls speared with pretzel rods, dipped in almond bark coating, and suspended between two homemade chocolate cookies decorated with royal icing. I was rapidly running out of royal icing, and the bark coating was prone to cracking, but we know that the Empire had seen more prosperous days, and their fleet might have well needed a bit of a refurb.
The whole effect was pretty fun, though.
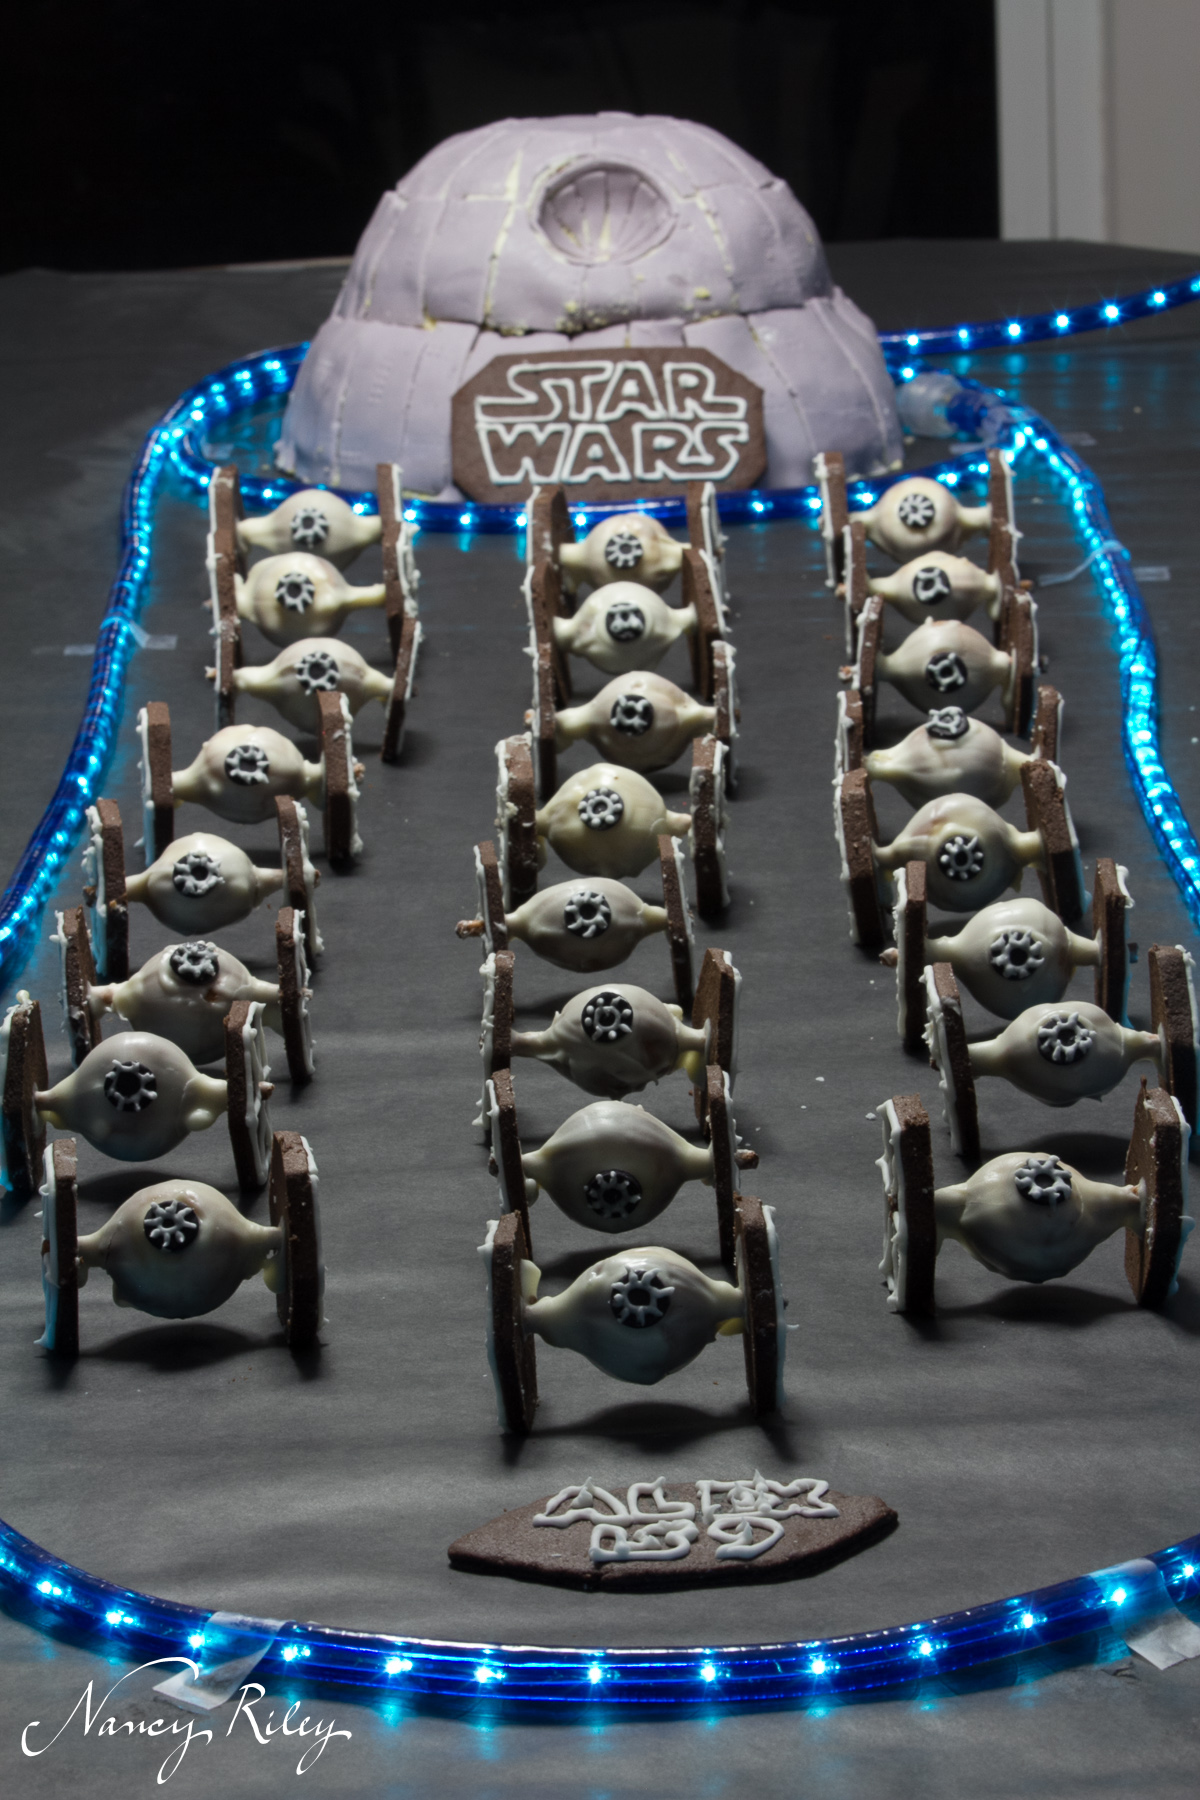
Especially at night with the lights off.

The trick in these two last photos was that the ambient light had to be dim enough to see the blue rope lights. In full daylight, the lights didn’t show up much at all. With a dim overhead light, I could balance the rope light with the light from above, and with the lights off, I could get the eerie effect of the whole scene lit from the rope lights alone. A small aperture of f/16 created the starbursts in the rope light.
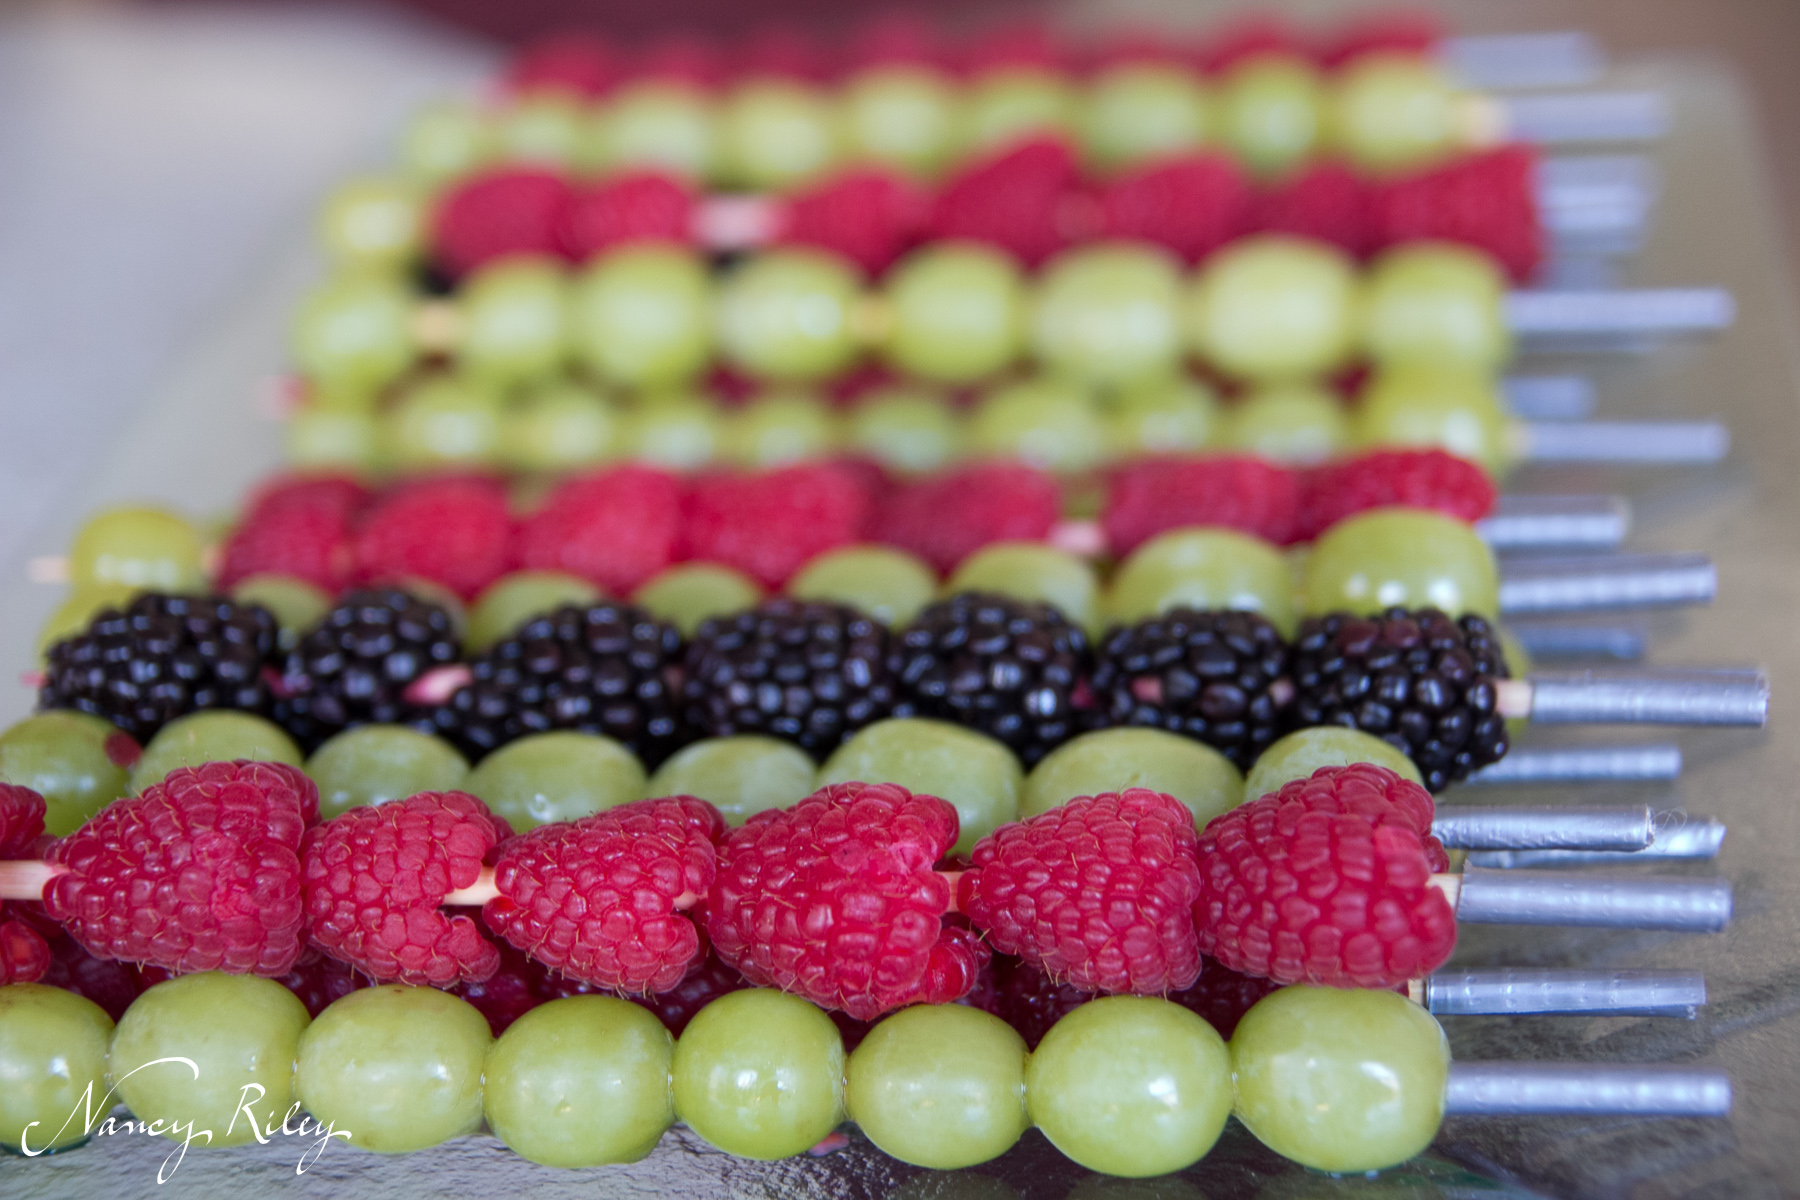
The fruit sabers were very simple to make, with duct tape handles, and looked a lot better than the more complex projects. It was harder not to nibble on them before the party, though.
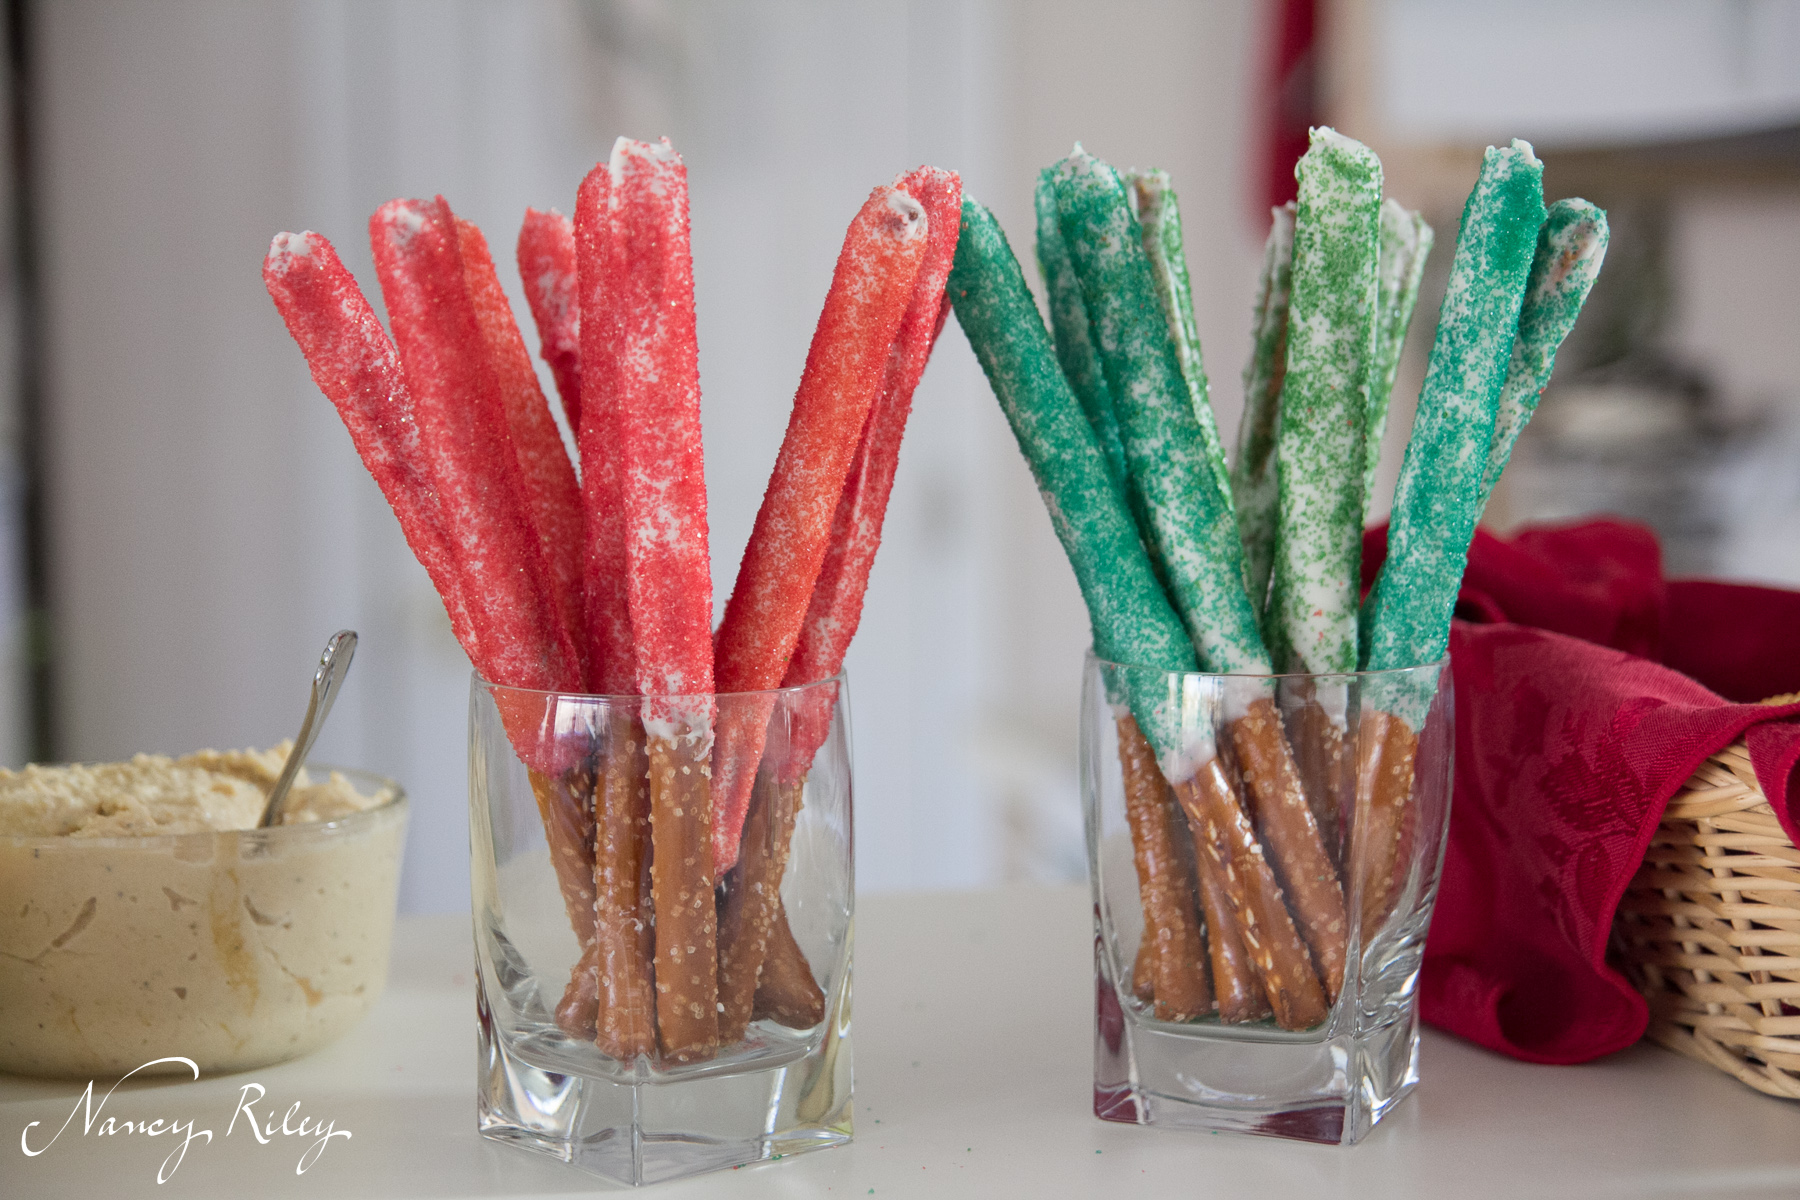
Making pretzel sabers was messier and not quite as picturesque, but they did get eaten pretty quickly.
I was originally planning a green “Yoda Soda” punch, but I didn’t want to get stuck with a punch bowl full of green slime that the kids wouldn’t drink, so I opted for simple lemonade instead and dropped a Han Solo in carbonite ice block in it.
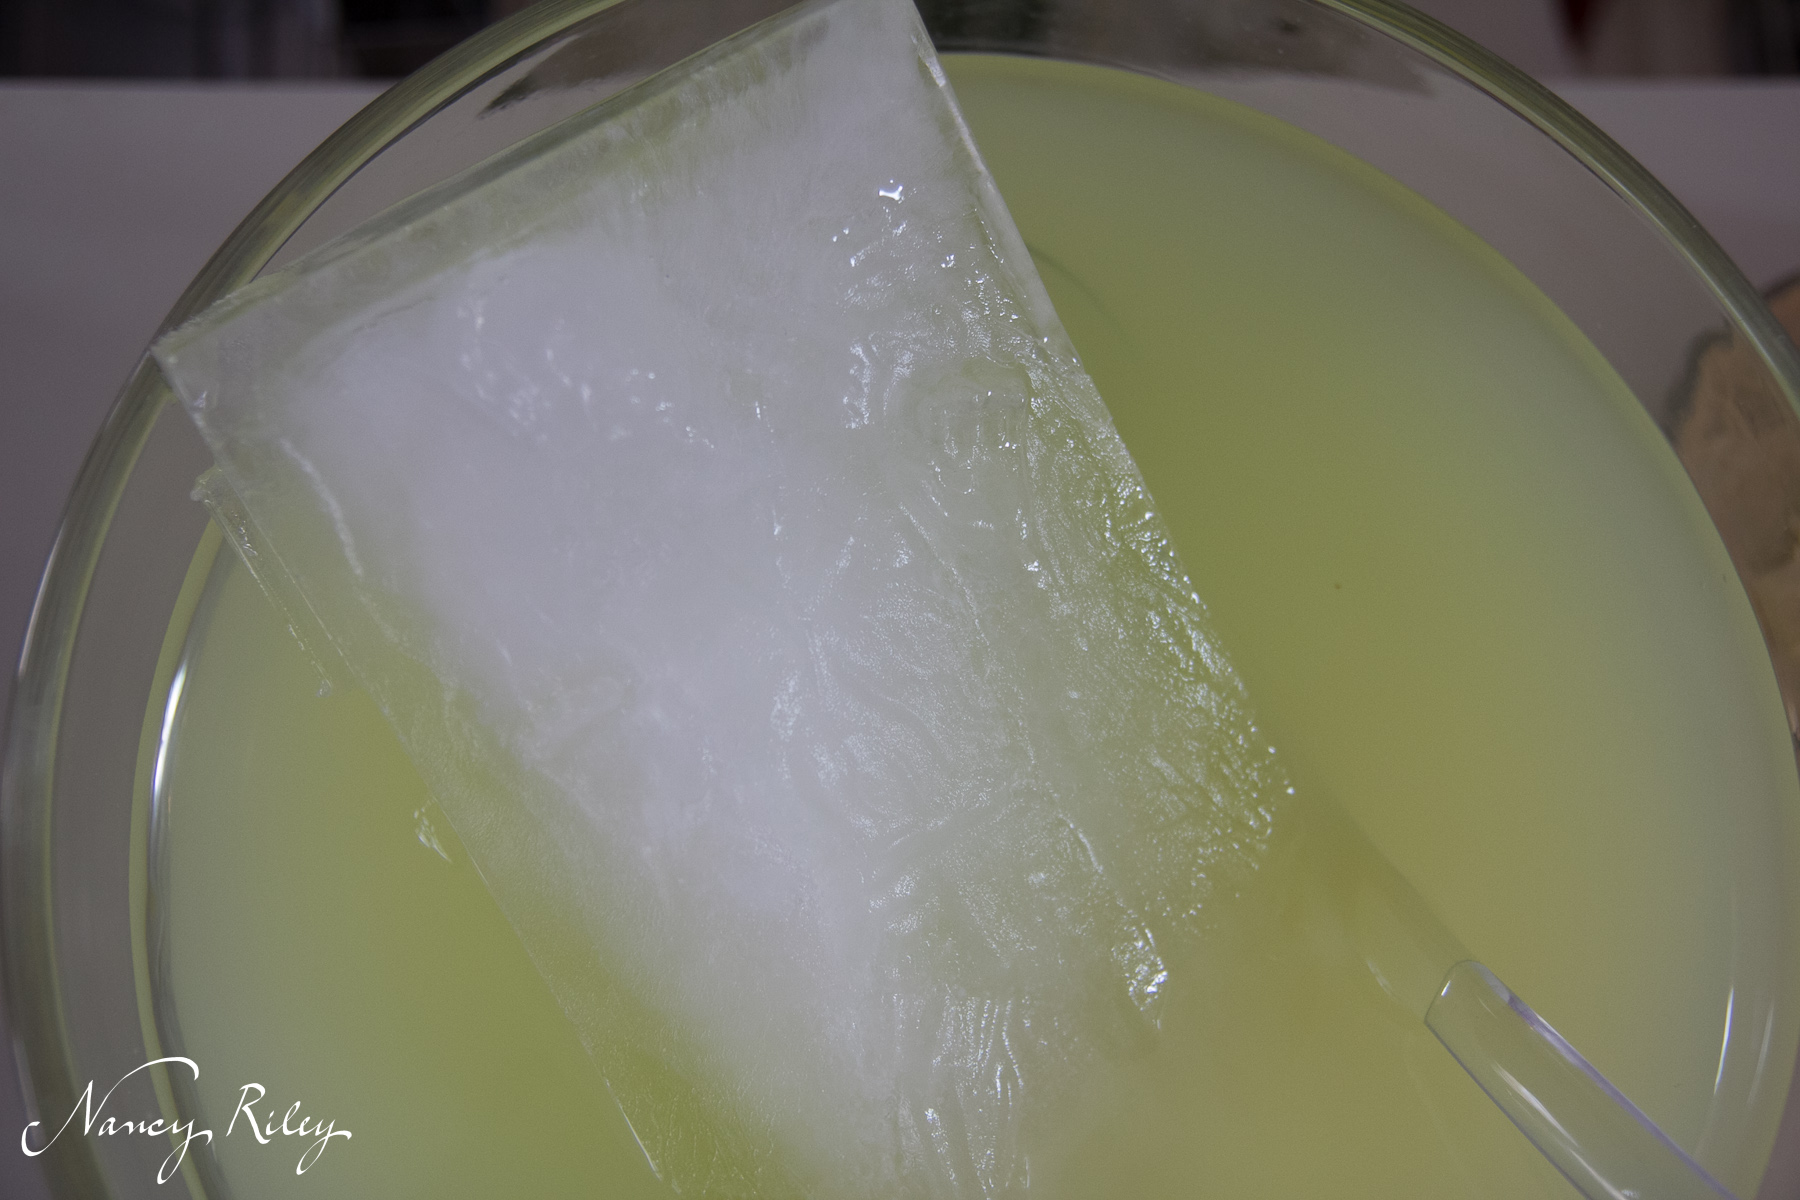
Yes, they actually manufacture food grade silicone molds for this. I bought one, kind of by accident (thought I was getting R2D2), but Han came in handy for chilling the lemonade.
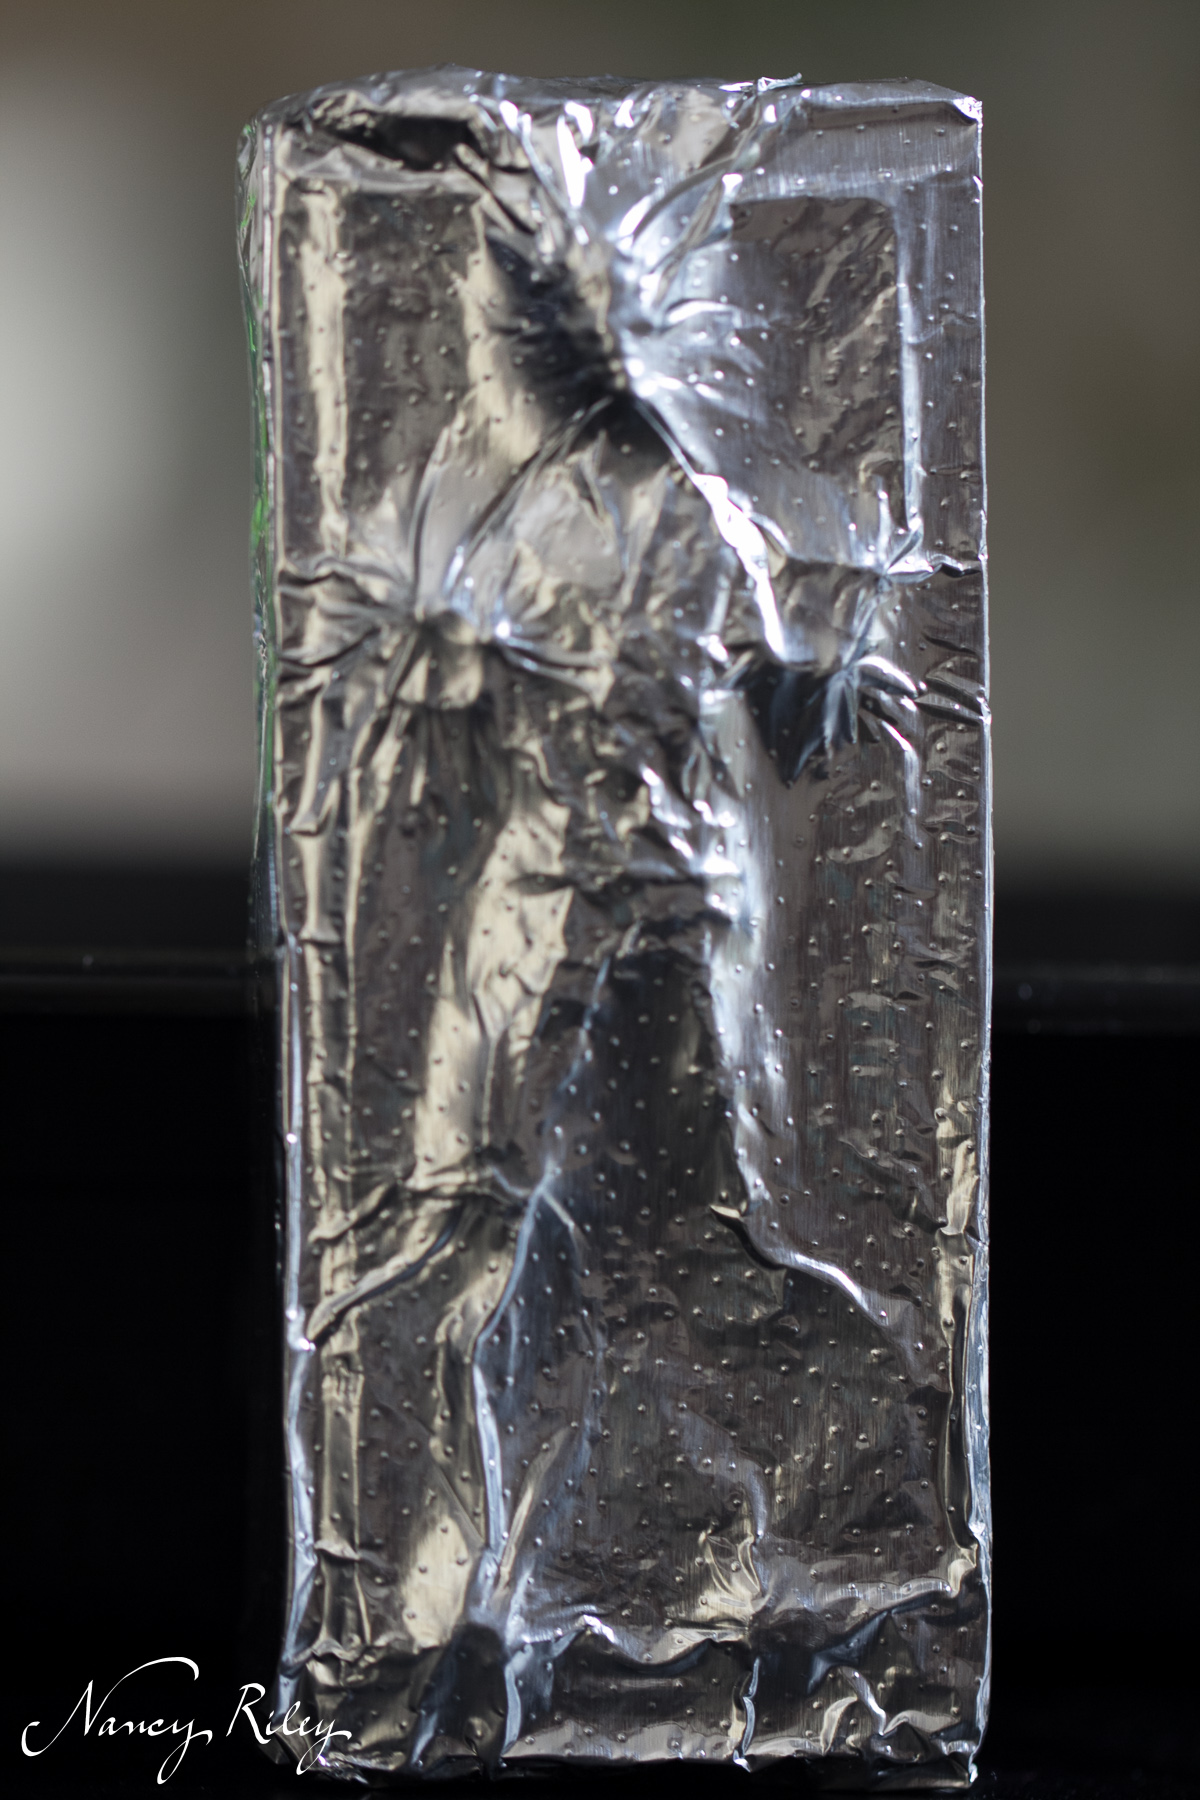
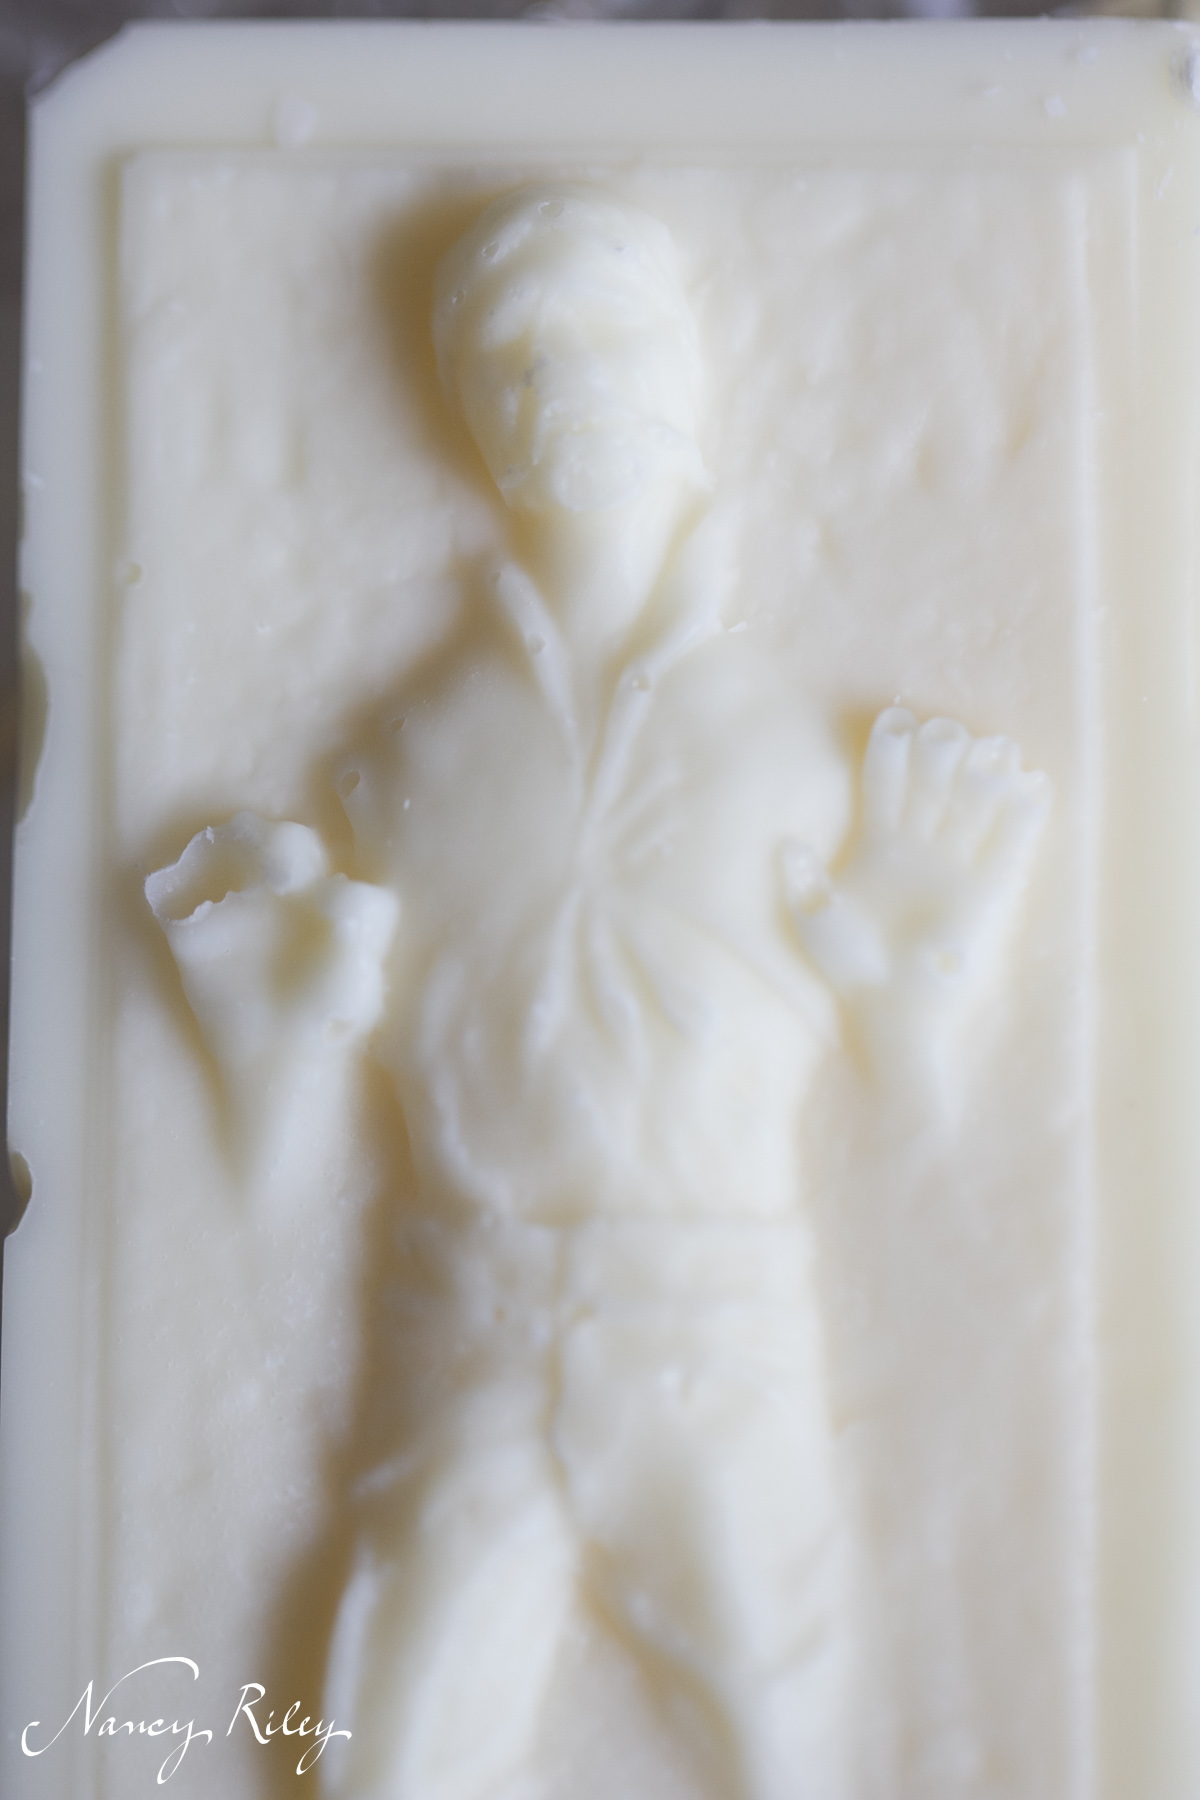
Speaking of Han Solo molds, he also comes in small sizes for chocolate bars. We gave them as party favors. Not all the kids could identify him, but I’m pretty sure they will eat him, nonetheless.
Even though I didn’t have the ambition to pull off the R2D2 cake, my favorite droid did make a cameo appearance.
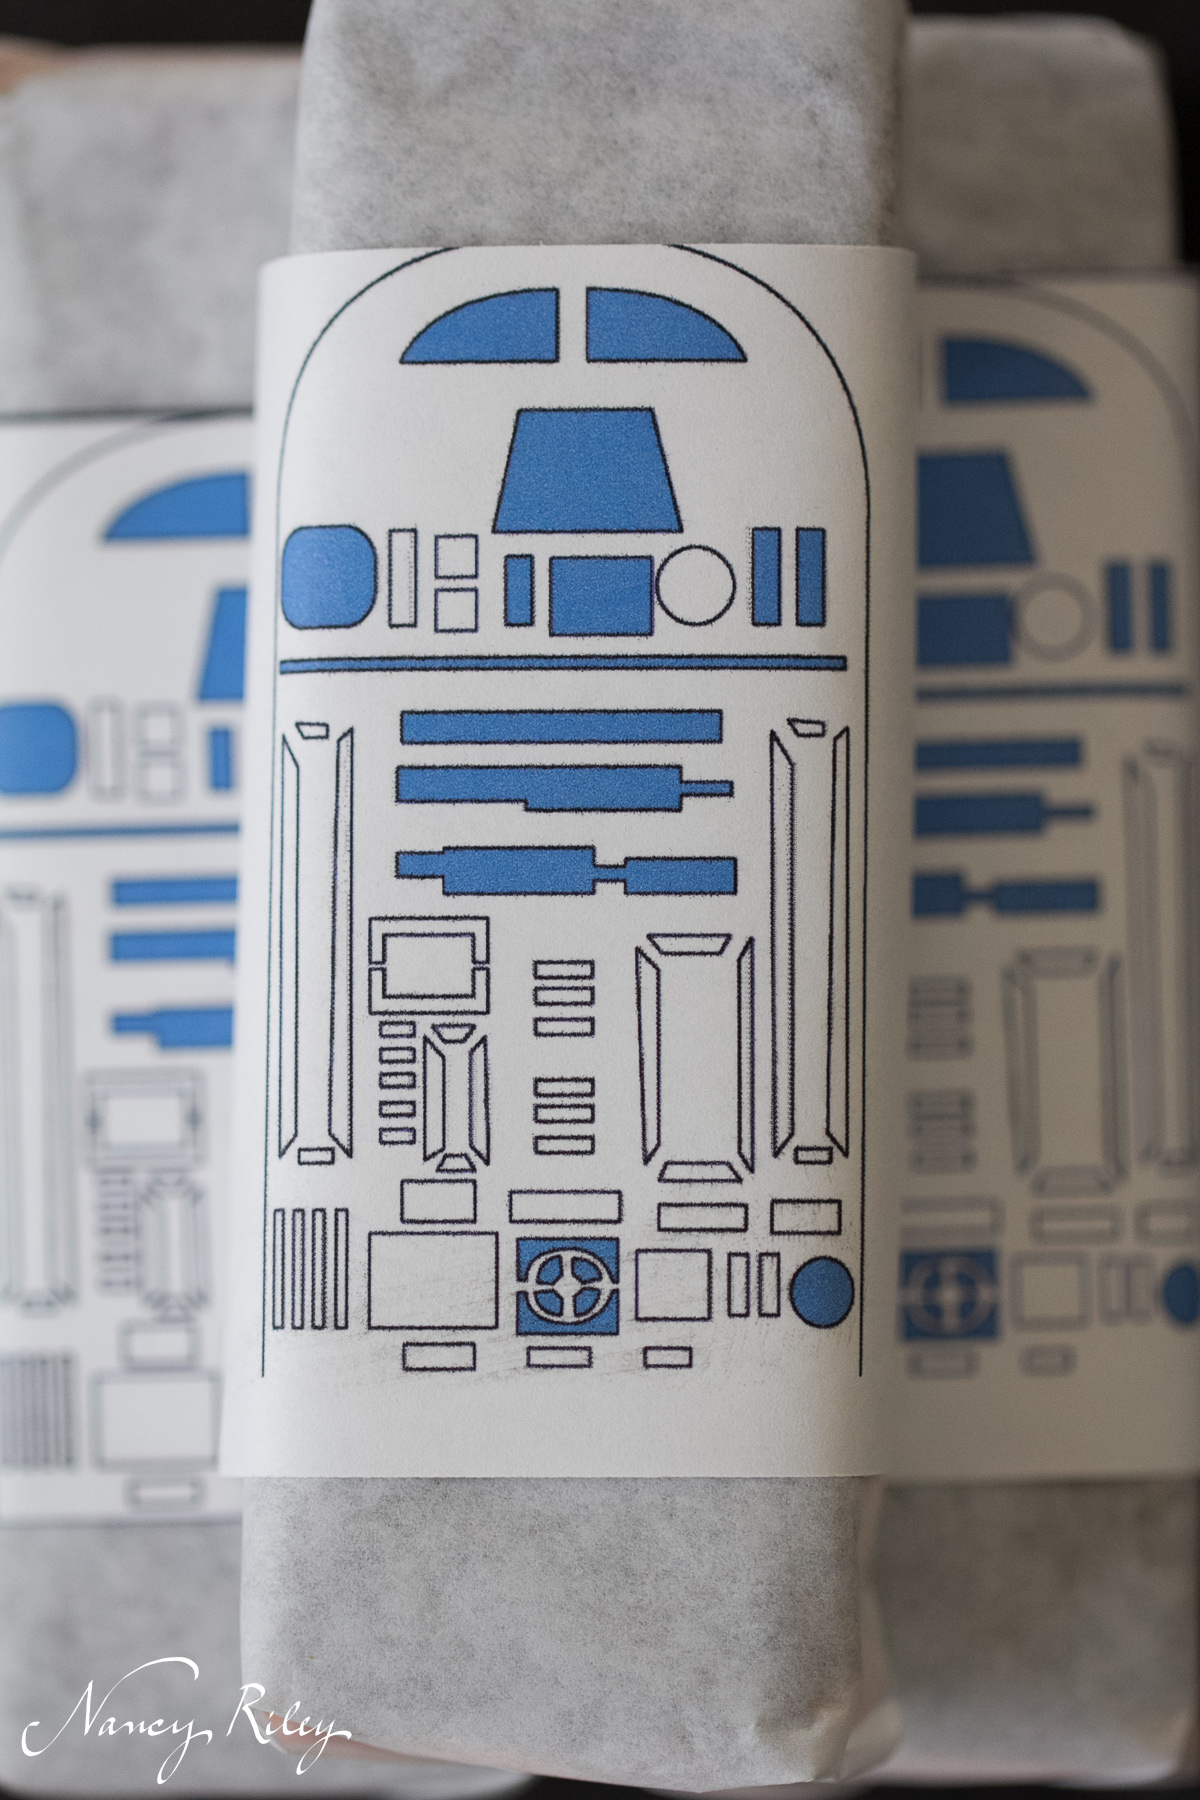
My friend shared a Pottery Barn link where one could download themed party printables. This was meant to go on a popcorn bag, but with a few slight modifications, he worked well for the ice cream sandwich wrappers.
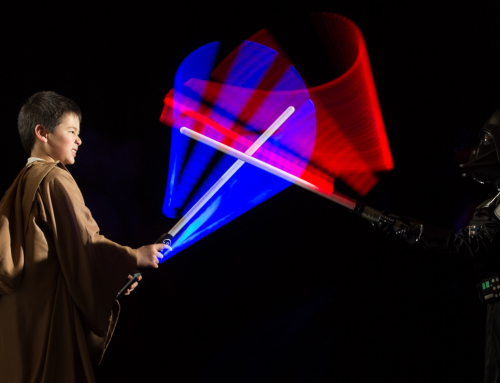
In a future post, I will share the pictures of some of the guests in their Jedi training experience. Think of lightsabers and light painting. Very cool effects.


I am totally in awe of you, Nancy. TOTALLY. Both the pictures and the themed foods are gorgeous.
You are too kind! I’m pretty sure if you had seen the imploded Death Star, though, awe wouldn’t have been your first reaction. 🙂